I’ve coached clients and tested methods for years, and I know that how to remove lash extensions at home can feel scary. The good news is you can do it safely with patience, gentle products, and the right steps. In this guide, I explain what works, what to avoid, and how to protect your natural lashes. You’ll get pro tips, common mistakes to dodge, and a clear plan you can follow today.

Source: www.youtube.com
Read This First: Safety, Risks, And When To See A Pro
Lash extensions use cyanoacrylate-based glue. It softens with time, oil, warmth, and humidity. It does not dissolve with plain water. Tugging or picking will snap your natural lashes and irritate your eyelids. Gentle breakdown is the only safe path.
If you have eye redness, pain, swelling, or a history of eye allergies, pause and book a removal with a licensed lash artist. If extensions were applied very close to the lash line, at-home removal may be risky. Your vision and lash health come first.
If you feel burning during removal, stop right away. Rinse your eyes with sterile saline or clean water and seek help if symptoms persist. Safety beats speed.
Source: thelashspa.com.au
What You Need For At‑Home Lash Removal
You do not need harsh solvents. You need time and light pressure. Gather these items before you start.
- Oil cleanser A rich oil-based cleanser that is safe around eyes.
- Oil You can use coconut, mineral, jojoba, or a dedicated lash extension remover oil.
- Gentle cotton tools Cotton pads, cotton swabs, or lint-free applicators.
- Warmth A bowl of warm water and a clean towel to create gentle steam.
- Clean spoolie A mascara wand that is clean and dry.
- Mirror and good light So you can see each step.
- Patience Plan 20 to 40 minutes without rushing.
Pro tip from my kit: I prefer mineral oil because it is stable, scent-free, and glides well. It helps avoid over-rubbing.

Source: www.youtube.com
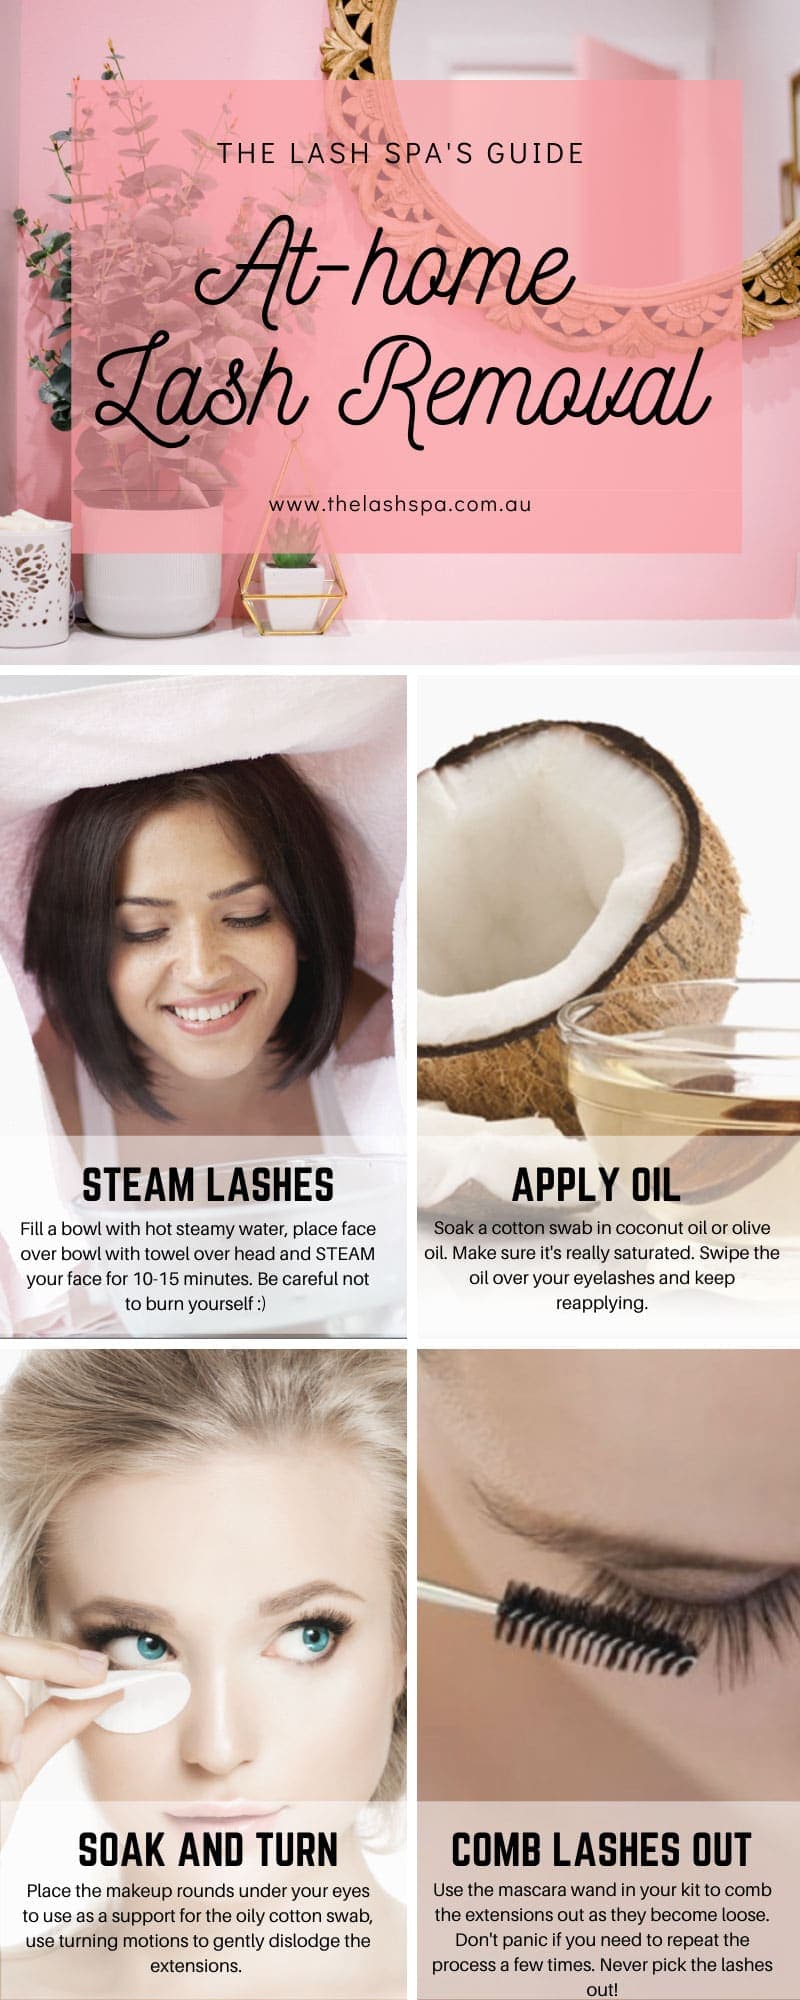
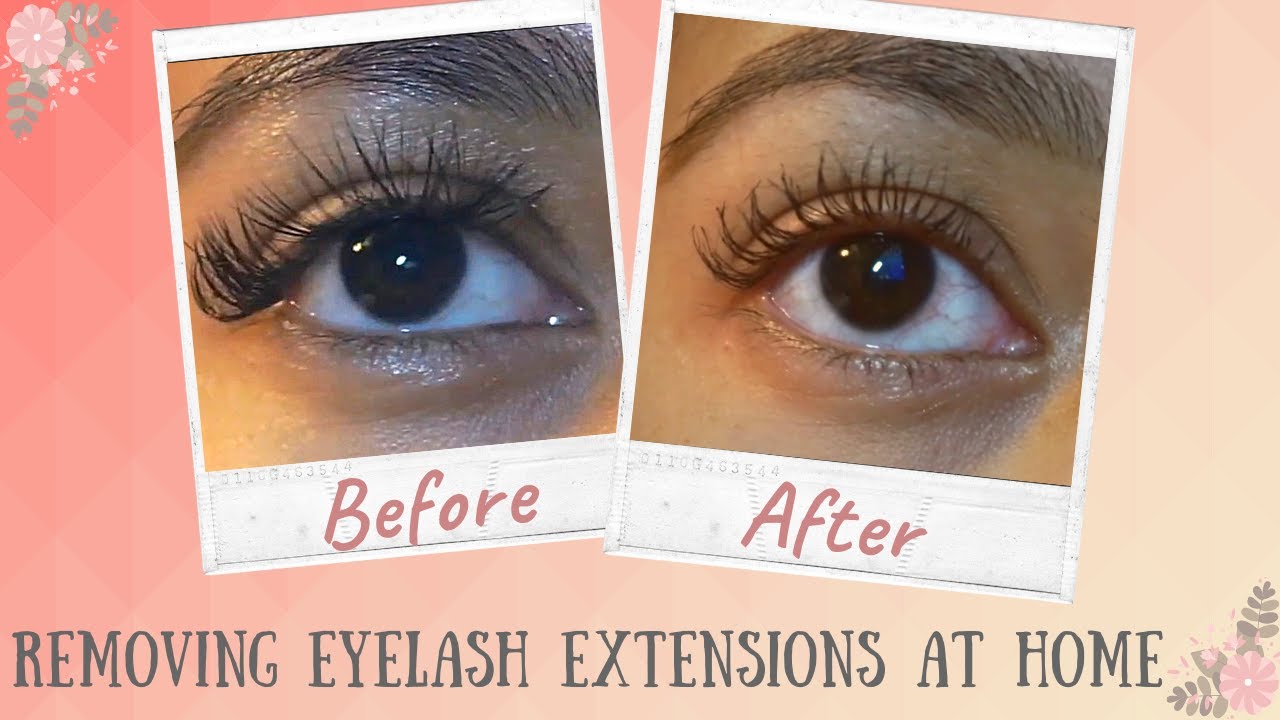
Step-By-Step: How To Remove Lash Extensions At Home
Follow this method slowly. The goal is to loosen the adhesive over time, not force it.
- Wash your hands Start clean to protect your eyes.
- Remove makeup Use an oil cleanser to melt mascara or liner. Rinse and pat dry.
- Soften with steam Soak a towel in warm water. Press over closed eyes for 2 to 3 minutes. The warmth helps the bond relax.
- Apply oil Close one eye. Dip a cotton swab in oil. Glide along the lash line where the extensions attach, from base to tip, keeping oil out of your eye.
- Wait and wiggle Let the oil sit for 2 to 3 minutes. Use a clean spoolie to very gently comb through the extensions. They should slip off with little resistance.
- Reapply as needed Stubborn clusters need more oil and time. Repeat the oil and spoolie steps, then rest another 2 to 3 minutes. Do not pull.
- Cleanse again Once most extensions release, cleanse with oil cleanser, then a gentle face wash to remove residue.
- Nourish and rest Finish with a light layer of oil on your natural lashes. Avoid mascara for 24 hours.
If an extension will not move, leave it. It is safer to let it shed naturally than to yank it.
Source: www.youtube.com
What Not To Do
Some shortcuts cause damage. Skip these common mistakes.
- Do not pick or pull This breaks natural lashes and can cause gaps.
- Do not use acetone or hair glue remover These sting and can harm your eyes and skin.
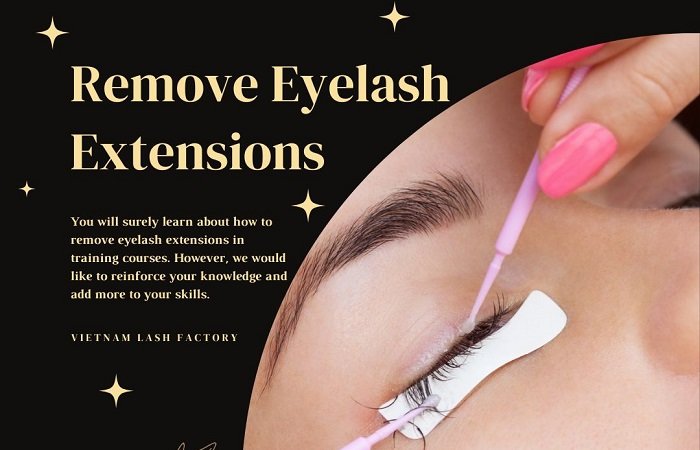
- Do not use sharp tools Tweezers near your eye are risky at home.
- Do not rush More time with oil beats more force every time.
- Do not sleep in heavy oil It can migrate into eyes and cause irritation.
Source: www.youtube.com
Aftercare: Help Your Natural Lashes Recover
Your lashes will thank you for a gentle reset. Keep the routine simple and soothing for a week.
- Clean daily Use a mild lash-safe cleanser to prevent buildup.
- Condition Lightly brush on mineral oil or castor oil at night, then wipe excess.
- Go makeup-light Avoid waterproof mascara for a few days.
- Hands off Resist rubbing your eyes so new growth can thrive.
- Support growth Eat protein-rich foods and stay hydrated to support hair cycles.
From my experience, the biggest glow-up comes from consistency. Small, gentle habits bring lashes back fast.
Source: vietnamlash.com
Why Oil And Steam Work: A Simple Science Note
Lash adhesive is strong when dry and cool. Warmth makes it more flexible. Oils slip between the bond and the lash fiber, reducing grip. This is why oil cleansers can slowly weaken residue around the attachment without harsh chemicals.
Professional removers use gel formulas that isolate solvent near the bond while protecting eyes. At home, a slow oil method is safer and easier to control, though it takes longer.
Real-World Tips From My Toolkit
After hundreds of removals, these tricks consistently help.
- Work in sections Treat the outer corner first. It is easier to reach and builds confidence.
- Angle matters Sweep oil upward along the lash, not across the waterline.
- Blot in between If your eyes feel slick, gently blot the lid before reapplying oil.
- Timing sweet spot Three micro-cycles of oil, wait, and comb usually remove 90 percent of extensions.
- Night routine If eyes get tired, stop and continue the next day. Slow is safe.
A lesson I learned the hard way: more rubbing does not mean faster removal. It only leads to redness and fragile lashes.
When To Book A Professional Removal
There are moments when a pro is the best choice.
- You feel burning, swelling, or strong itching.
- Extensions were applied with heavy glue or multiple clusters on one lash.
- You have sensitive eyes, blepharitis, or recent eye surgery.
- You are short on time and want a quick, controlled removal.
A licensed lash artist uses gel removers, eye pads, and isolation tools to protect your eyes and speed the process. It is worth it when comfort or safety is a concern.
Frequently Asked Questions Of How To Remove Lash Extensions At Home
Q. Can I remove lash extensions with coconut oil?
Yes. Coconut oil can help loosen the bond. Apply a small amount on the attachment area, wait a few minutes, and gently comb. Rinse well to avoid residue.
Q. Will olive oil work as well as a remover?
Olive oil can soften adhesive, but it is thicker and may blur vision if it migrates. Use a small amount and keep it above the lash line. Mineral or jojoba oil is easier to control.
Q. How long does at-home removal take?
Most people need 20 to 40 minutes. Tough sets can take longer. More time with oil and rest cycles is safer than pulling.
Q. Is it safe to use steam from the shower?
Warm shower steam can help, but keep water out of your eyes. A warm towel compress is easier to control and safer.
Q. Why did some extensions stay on?
Those bonds may be newer or thicker. Leave them and repeat the process the next day, or visit a pro for targeted removal.
Q. Can I wear mascara right after removal?
Wait at least 24 hours. Cleanse, condition, and let your lashes rest so the follicles recover.
Q. Do lash serums help after removal?
A quality lash serum can support the look of fuller lashes over time. Patch test first if you have sensitive eyes.
Wrap-Up And Next Steps
You can remove lash extensions at home safely with patience, oil, and gentle technique. Skip harsh chemicals and never pull. Support your natural lashes with light care for a week, and they will bounce back.
Ready to try? Set aside a calm half hour, gather your tools, and follow the steps above. If anything feels off, pause and book a pro. Your eyes are worth it.
Want more beauty how-tos? Subscribe, share your results in the comments, or ask a question for personalized tips.
Watch This Video on how to remove lash extensions at home
>>> Get More Review Here: How To Remove Gel Polish At Home <<<