Slippery bathroom rugs are an accident waiting to happen. I’ve helped homeowners fix this issue in small apartments and busy family homes, and the best solutions are simple, cheap, and last. In this guide, I’ll show you exactly how to make bathroom rugs non slip with methods I’ve tested myself. You’ll learn quick fixes, pro tips, and smart upgrades that truly keep rugs in place without damaging floors. Let’s keep your bathroom safer, today.
Why Bathroom Rugs Slip And Why It Matters
Bathrooms are high-moisture zones. Water, soap film, and smooth tile make a slick combo. Rugs slide because their backing wears down or never had grip to begin with. Some fibers also repel adhesives, so cheap fixes fail fast.
Falls in bathrooms are common, especially for kids, seniors, and anyone with limited mobility. Non slip bathroom rug setups reduce risk and help you move with confidence. Think of friction like seatbelts for your floor—small detail, big safety.

Source: www.amazon.com
Prep First: Clean, Dry, And Flatten
Good prep makes any solution stick better and last longer. Start by washing and fully drying the rug per its care label. Wipe the floor with a mild cleaner to remove oils and residue. Let it dry completely.
Flatten curled corners with a warm iron on low (if safe for the fabric) or by weighing them overnight. If the backing is flaking, trim loose bits so new grip materials can bond well.
Best Non-Slip Methods (Ranked)
Here’s what works best, from most reliable to quickest fix:
- Premium felt-plus-rubber rug pad: Best all-around grip and comfort; protects floors and extends rug life.
- Silicone caulk or latex backing lines: Budget-friendly DIY that creates custom grip dots or waves.
- High-quality double-sided carpet tape: Strong hold; great for flat woven rugs on smooth tile.
- Hook-and-loop (Velcro) squares: Semi-permanent option for exact placement in heavy-traffic spots.
- Non-slip spray or liquid latex: Fast application; good for small or irregular rugs.
- Shelf-liner hack: A quick, temporary fix for renters and guest baths.
Choose based on rug type, floor surface, moisture level, and how often you wash the rug.
>>> Check the price on Amazon <<<
Step-By-Step Tutorials
Method 1: Premium Rug Pad (Best Overall)
- Choose a pad made of felt-and-natural rubber or thermoplastic rubber. Make sure it’s rated safe for your floor type.
- Trim pad to be 1 inch smaller than the rug on all sides.
- Clean and dry the floor. Lay the pad rubber side down, then place the rug on top and smooth out bubbles.
- Test by stepping on the rug from different angles.
Pro tip: Avoid cheap PVC pads that can discolor floors over time.
Method 2: Silicone Caulk Backing (Budget DIY)
- Wash and dry the rug. Place it upside down on a flat surface.
- Run small lines or dots of 100% silicone caulk on the backing in a grid or wave pattern.
- Smooth the lines gently with a gloved finger so there are no sharp ridges.
- Let it cure 24 hours. Place on a clean, dry floor.
Lesson learned: Less is more. Thick blobs can feel lumpy and take longer to cure.
Method 3: Non-Slip Spray or Liquid Latex
- Mask edges if you want a clean border. Shake the product well.
- Spray or brush a thin, even coat on the backing. Add a second coat if needed.
- Dry fully per label directions, then test grip before use.
Real-world note: This shines on lightweight, decorative rugs that shift easily.
Method 4: Double-Sided Carpet Tape
- Choose heavy-duty tape rated for tile, vinyl, or hardwood.
- Apply strips near edges and an X in the center of the rug’s underside.
- Press onto the clean, dry floor. Step across the rug to set the bond.
Watch-outs: Test a small area first to avoid adhesive residue on delicate finishes.
Method 5: Hook-and-Loop Squares
- Stick loop side to the floor and hook side to the rug corners.
- Press firmly for 30 seconds per square.
- Great for narrow bathrooms where rugs drift sideways.
Tip: Leave a tiny gap near edges so water can’t pool under the squares.
Method 6: Shelf-Liner Hack (Temporary)
- Cut a piece of grippy shelf liner slightly smaller than the rug.
- Place liner rubber side down, rug on top.
- Ideal for renters and guest baths; quick to lift for cleaning.
Reminder: Replace when it flattens or loses grip.

>>> Check the price on Amazon <<<
Source: www.amazon.com
Materials And Tools Checklist
- Felt-and-rubber rug pad or non-slip pad
- 100% silicone caulk or liquid latex
- Non-slip spray (optional)
- Heavy-duty double-sided carpet tape
- Hook-and-loop squares
- Grippy shelf liner
- Scissors or utility knife and straightedge
- Mild cleaner, microfiber cloths, gloves, masking tape
Keep it simple. Start with the pad; add DIY backing only if needed.

>>> Check the price on Amazon <<<
Care, Maintenance, And Testing
Moisture breaks down adhesives and pads over time. Build a quick routine:
- After showers, hang or drape the rug to dry faster.
- Wash the rug on a gentle cycle per label. Air dry flat to protect backing.
- Wipe the floor weekly to remove soap residue and oils.
- Test grip monthly: try to slide the rug with your foot. If it moves, refresh the method.
Safety check: If anyone in the home is at higher fall risk, consider two layers—a quality pad plus light silicone lines—for extra security.
Common Mistakes To Avoid
- Skipping surface prep. Dirt and moisture kill adhesion.
- Using PVC pads on sensitive floors. They can stain or react with finishes.
- Overloading with caulk. Thick lines feel bumpy and can peel.
- Taping to damp tile. It won’t bond well and may leave residue.
- Ignoring the care label. Heat or harsh washing can ruin backing.
When To Replace Or Upgrade Your Rug
Some rugs just won’t grip well, even with hacks. Consider a new rug if:
- The backing is cracked, sticky, or shedding.
- The pile is too plush and “floats” on pads.
- Moldy odors persist despite washing.
- The rug is too small for the space and won’t stay put.
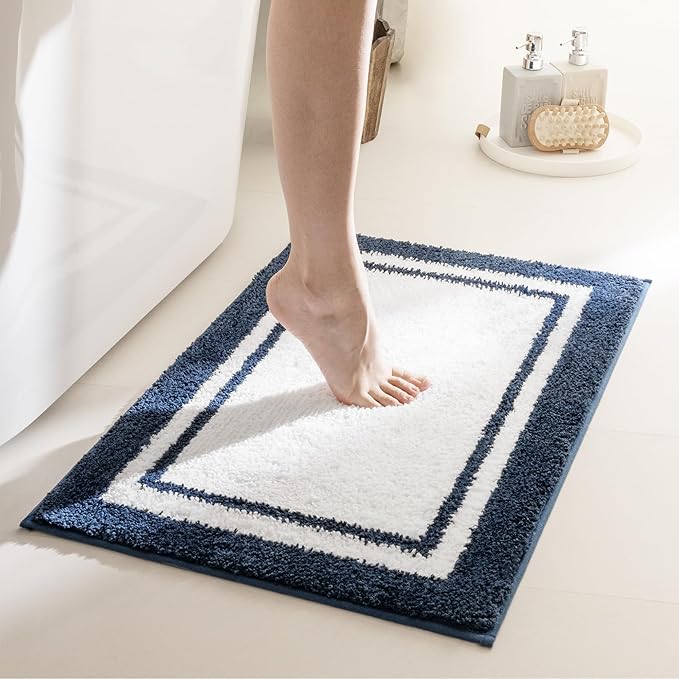
Look for rugs labeled with natural rubber backing or “non slip bathroom rug,” and match size to floor area so edges don’t curl.
Cost Breakdown And Quick Recommendations
- Rug pad: 15–40 dollars. Best value and longest life.
- Silicone or latex: 5–12 dollars. Strong budget fix.
- Tape: 8–15 dollars. Great for flat rugs; check residue risk.
- Hook-and-loop: 6–12 dollars. Precise placement, semi-permanent.
- Shelf liner: 5–10 dollars. Temporary and renter-friendly.
My go-to: a felt-and-rubber pad for daily use, plus light silicone lines on tricky corners. It’s affordable, safe, and easy to maintain.
Frequently Asked Questions Of How To Make Bathroom Rugs Non Slip
Q. What’s the best way to keep a bathroom rug from slipping on tile?
Use a felt-and-rubber rug pad cut 1 inch smaller than the rug. Clean and dry the tile first. For extra hold, add small silicone lines on the rug’s backing.
Q. Will double-sided tape damage my floor?
Quality carpet tape labeled safe for your floor type usually won’t, but always spot test first. Remove slowly and clean with a gentle adhesive remover if needed.
Q. Can I wash a rug with silicone or latex backing?
Yes, if you use a gentle cycle and air dry flat. High heat can crack or soften the backing, reducing grip.
Q. Are PVC rug pads safe for vinyl or hardwood?
Many PVC pads can stain or react with finishes over time. Choose felt-and-natural-rubber or certified floor-safe pads instead.
Q. How do I stop corners from curling?
Apply small dots of silicone or hook-and-loop squares at the corners. Also, flatten with a warm iron on low (if safe) or by weighing overnight.
Q. What if my rug still moves after using a pad?
Check for moisture or soap film on the floor. Clean and dry, then add light silicone lines or switch to a higher-friction pad.
Wrap-Up And Next Steps
You now know how to make bathroom rugs non slip with proven, real-world methods. Start with smart prep, add a quality rug pad, and layer in silicone or tape only where needed. Test monthly, keep things dry, and your rug will stay put.
Take action today: pick a method that fits your rug and floor, and secure it in under an hour. Want more home safety tips and simple DIY wins? Subscribe, share this guide with a friend, or drop your questions in the comments.
Watch This Video on how to make bathroom rugs non slip
Related Posts
- See More Review: How To Dry A Bathroom Rug