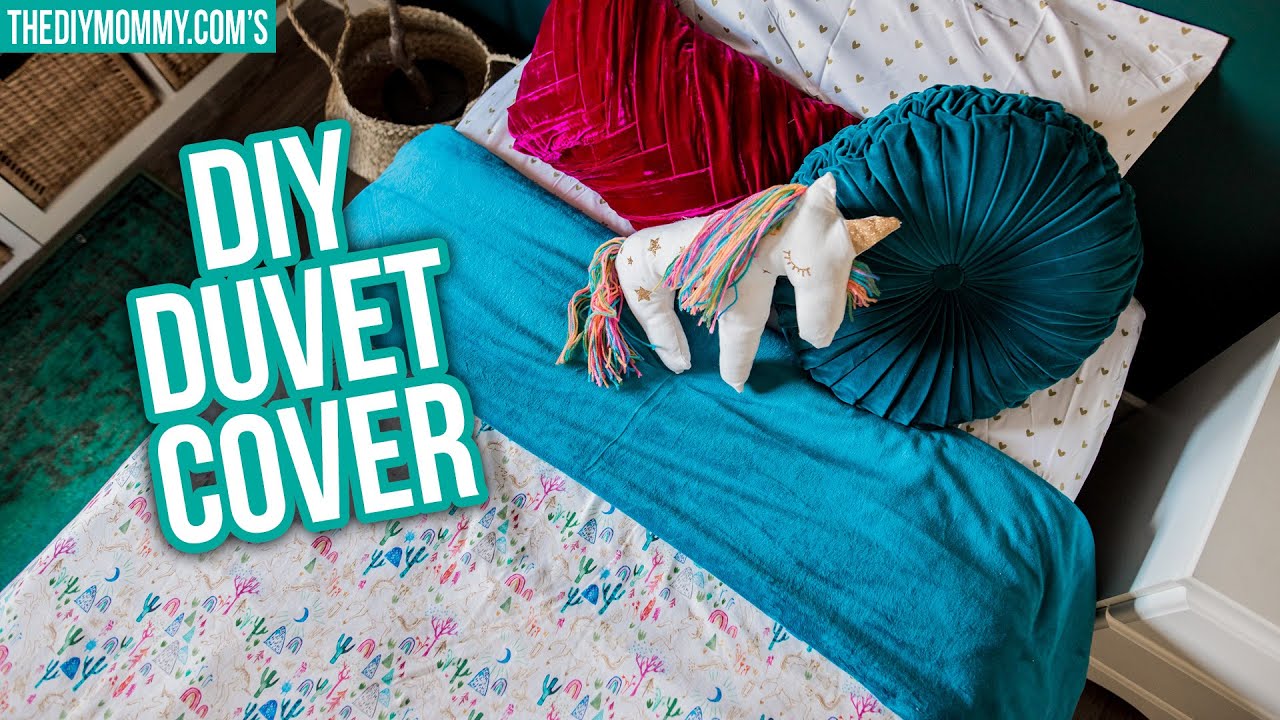
You can make a duvet cover from two flat bed sheets by measuring your duvet insert, joining three sides with a sewing machine, adding corner ties, and finishing the open end with buttons, snaps, or a zipper.
Making a duvet cover from bed sheets is a simple way to refresh a bedroom without buying a new bedding set. In American homes, flat sheets are easy to find in standard Twin, Full, Queen, and King sizes. You can reuse sheets from an old bedding set or choose two new ones that match your room.
The basic project needs two flat sheets, matching thread, scissors, pins, and a sewing machine. One sheet becomes the top, while the other forms the back. You sew three sides together and leave one end open so you can place the duvet inside.
The most important step is measuring the duvet insert, not just trusting the size printed on the sheets. Bedding sizes can vary by brand, and a cover that is too large may let the insert bunch up. A cover that is too small can pull at the seams and make the duvet hard to spread.
You can also customize the opening to suit your needs. Buttons give the cover a classic look, snaps are quick to use, and ribbon ties offer a simple handmade finish. With a little care, two ordinary flat sheets can become a useful, washable duvet cover.
What You Need To Make A Duvet Cover From Bed Sheets
You only need a few basic sewing supplies to turn flat sheets into a duvet cover. Most of these items may already be in your home. Gather everything before you start so you can work without stopping to find tools.
Choose two flat sheets made from the same fabric type when possible. Cotton sheets are a practical option because they are easy to wash and comfortable for regular use. You can also use cotton blends, linen, or other washable sheet fabrics if their care needs suit your household.
If you want a reversible duvet cover, choose two different colors or patterns. For a simple matching look, use two sheets from the same set. Avoid sheets with large worn areas, thin spots, or damaged hems because those areas may not hold up well during regular use.
Source: i.ytimg.com
Two flat bed sheets
Use two sheets large enough for your duvet insert. They can match or have different colors and patterns.
Sewing machine
A basic machine with a straight stitch is enough for the main seams. A zigzag stitch can help finish raw edges.
Matching thread
Choose strong all-purpose sewing thread that works with your sheet fabric.
Measuring tape
Use it to measure the duvet insert, mark the sewing lines, and check the finished cover.
Fabric scissors
Sharp fabric scissors make clean cuts and help prevent frayed edges.
Pins or fabric clips
These hold the two large sheets together while you sew.
Iron and ironing board
Pressing the fabric helps remove wrinkles and makes the seams easier to sew.
Closure materials
Choose buttons, snaps, a zipper, hook-and-loop tape, or ribbon ties for the open end.
Ribbon or cotton tape
Optional pieces can become inside corner ties that keep the duvet insert in place.
Can You Use Fitted Sheets Instead Of Flat Sheets?
Flat sheets are easier to use because they have a large, even surface. Fitted sheets have elastic corners and shaped edges, which make them harder to lay flat and sew into a neat cover.
You can reuse a fitted sheet if you remove the elastic and trim away the shaped corners. However, the fabric may need extra work to become a clean rectangle. If you have two flat sheets available, they are usually the better starting point.
Best option
Two flat sheets with similar fabric and care instructions.
Possible alternative
A fitted sheet with its elastic and curved corners removed.
Choose Sheets With The Right Fabric
Cotton percale has a crisp feel, while cotton sateen usually feels smoother. Linen can offer a relaxed texture, but it may wrinkle more. Cotton-polyester blends are another option if you want a fabric that is often easier to care for.
The two sheets do not have to be identical, but their weight and washing needs should be close. A very thin sheet paired with a heavy one may pull unevenly at the seams.
Step 1: Measure Your Duvet Insert
Start by measuring the duvet insert while it is lying flat on a bed or clean floor. Do not use the mattress size as your main measurement. A Queen mattress does not always come with a duvet insert of the same dimensions.
Measure the width from one side to the other. Then measure the length from the top edge to the bottom edge. Write both numbers down and check them once more before you cut the sheets.
The finished cover should be close to the insert’s measurements. You need to add fabric for the seams and the bottom opening, but those allowances are not part of the finished size. Keeping these two measurements separate helps prevent a cover that is too small.
For a basic project, a half-inch seam allowance on each joined edge is a useful starting point. That means you add about one inch to the overall width when both side edges will be sewn. Add suitable extra fabric to the length for the top seam and the bottom hem or closure.
Source: i.pinimg.com
Measure the width
Lay the insert flat and measure across its widest point.
Measure the length
Measure from the top edge to the bottom edge without stretching the fabric.
Add seam allowance
Allow fabric for the seams on the sides and top. A half-inch allowance on each seam is a practical beginner option.
Plan the bottom opening
Leave extra fabric for a folded hem or another finish if the sheet edges need to be adjusted.
Example Measurements For A Queen Duvet
Imagine that your Queen duvet insert measures 90 inches wide and 90 inches long. These are hypothetical measurements, not a fixed standard for every Queen insert.
With a half-inch seam allowance on each side, you would need about 91 inches of fabric width before sewing. You would also allow extra length for the top seam and the bottom opening finish.
Your sheets must have enough usable fabric to cover these dimensions. If they are too small, you may need wider fabric panels or a different sheet size.
Insert width
90 inches.
Insert length
90 inches.
Side seam allowance
Half an inch on each side.
Required fabric width
About 91 inches before sewing, based on the stated example.
Check Your Sheets Before Cutting
Lay both sheets on a large flat surface and compare their usable width and length. Some sheets have deep decorative hems that take up space, so measure the fabric area rather than relying only on the package label.
If one sheet is larger than the other, you can trim it to match the smaller sheet, provided both still cover the insert with the required allowances. Do not cut until you are sure the final dimensions will work.
Step 2: Wash, Dry, And Prepare The Bed Sheets
Wash and dry both sheets before you begin sewing. This step helps remove dirt, dust, and some fabric finishes. It also gives washable fabric a chance to shrink before you measure and cut it.
Follow the care labels on the sheets. Use a suitable water temperature and drying method for the fabric. If the sheets have different care instructions, consider whether they will remain compatible after repeated washing.
Once they are dry, iron the sheets if needed. Large wrinkles can make your measurements inaccurate and cause the two layers to shift while sewing.
Check each sheet for stains, holes, weak seams, and loose threads. Repair small problems before assembly. If a sheet is badly worn, use another one rather than building the cover around damaged fabric.
Source: cozydiyhome.com
Prewash both sheets
Use their care labels as your guide so the fabric is ready for future laundering.
Dry completely
Do not sew damp sheets because moisture can affect how the fabric lies and measures.
Press out wrinkles
Iron the sheets on a suitable heat setting to create smooth working surfaces.
Inspect the fabric
Look for holes, thinning, torn hems, and other weak areas.
Why Prewashing Matters
Fabric can change size during its first wash. If you sew the cover before washing the sheets, later shrinkage may make the cover tight or cause the two layers to fit differently.
Prewashing also lets you check how the fabric feels after cleaning. This is useful when combining sheets from different sets. A soft, washable cover should remain comfortable after regular care.
Step 3: Position And Pin The Two Sheets
Place the two sheets on top of each other with their finished outer sides facing inward. In sewing, these are called the right sides. The less finished sides should face outward while you work.
Match the top edges and side edges as closely as possible. Smooth the fabric with your hands to remove folds. If the sheets have patterns, check that the design runs in the direction you want.
Pin or clip the layers together along the top and both side edges. Keep the bottom edge open because this is where the duvet insert will go. Mark the sewing line with fabric chalk if you find it helpful.
Take your time with this step. Bed sheets are large pieces of fabric, and even a small shift can create uneven edges. A few extra pins can make the sewing stage much easier.
Source: mygoldenthimble.com
Place the first sheet
Lay it flat with the right side facing upward.
Add the second sheet
Place it on top with its right side facing the first sheet.
Match the edges
Align the top and side edges and smooth out wrinkles.
Secure the layers
Use pins or clips along the three edges you plan to sew.
Leave the bottom open
Keep the opening clear for the duvet insert and the planned closure.
Which Side Of The Sheet Should Face Out?
The finished side of each sheet should face inward when you pin the layers together. This may seem backward, but it allows the finished sides to face outward after you turn the cover right side out.
If the sheets have different patterns, check their direction before pinning. This small check can prevent an upside-down design or a pattern that does not look right on the bed.
Step 4: Sew The Top And Side Edges
Use a straight stitch to join the top edge and both side edges. Start at one corner, sew along the top, turn at the next corner, and continue down the side. Repeat the process for the other side.
A half-inch seam allowance is a useful starting point for many standard sheet fabrics. Keep the seam line even and remove pins as you approach the sewing machine needle. Never sew over pins because the needle may strike them and break.
Backstitch a short distance at the beginning and end of each seam. This helps secure the stitches and reduces the chance of the seam opening during use.
After sewing, inspect the three joined edges. Make sure the corners are closed and there are no large gaps. If the fabric frays easily, finish the raw edges with a zigzag stitch or a serger where suitable.
You can also use French seams if you want to hide the raw fabric edges. These seams require an extra sewing step but create a neat inside finish. They are useful when the sheet fabric frays and you want a more polished result.
Source: cdn.homedit.com
Sew the top edge
Join the two sheets across the top using your chosen seam allowance.
Sew the first side
Keep the fabric smooth and follow the marked seam line.
Sew the second side
Repeat the same process while keeping the bottom opening free.
Secure the stitches
Backstitch at the ends and check that the corners are closed.
Finish raw edges
Use a suitable zigzag stitch or other seam finish if the fabric needs extra protection from fraying.
How To Make Stronger Seams
The duvet cover will be handled, turned, washed, and pulled when you insert the duvet. Strong seams help it stand up to this repeated use.
Choose a needle that suits the fabric weight and use a balanced stitch setting on a scrap piece first. Avoid pulling the sheets through the machine because this can stretch the fabric and make the seam uneven.
If you find a gap or loose section, sew over the weak area before turning the cover. It is easier to repair a seam while the inside is still accessible.
Should You Use A French Seam?
A French seam encloses the raw edges inside a second line of stitching. It creates a cleaner inside finish than leaving the edges unfinished.
For this method, first sew the layers with their wrong sides together using a narrow seam. Trim the allowance, turn the fabric so the right sides face each other, and sew again to enclose the raw edges. Make sure your total measurements account for the extra fabric used by this finish.
Step 5: Add Corner Ties To Keep The Duvet In Place
Corner ties help stop the duvet insert from sliding around inside the homemade cover. Without them, the insert may bunch up at one end or move away from the corners when you turn or shake the bedding.
You can make four ties from ribbon, cotton tape, or narrow strips of fabric. Each tie should be long enough to form a secure knot with its matching tie. Around 8 to 12 inches is a practical starting length, but you can adjust it to suit your materials.
Turn the cover so the inside is easy to reach. Attach one tie near each inside corner, close to the seam but not so close that it interferes with the stitching. Sew each tie firmly in place with several rows of stitches.
If your duvet insert already has loops, you can connect the cover ties to those loops. If it does not, you can sew small fabric loops onto the insert only if its construction and care instructions allow it. Avoid cutting or damaging the insert shell.
Before using the cover, test each tie by gently pulling it. The stitches should hold without tearing the sheet fabric. Loose ties should be repaired because they will not keep the insert in place.
Source: i.pinimg.com
Cut four ribbon pieces
Use similar lengths so all four corners can be secured in the same way.
Position the ties
Place one at each inside corner of the duvet cover.
Sew them securely
Use reinforced stitching so the ties can handle normal movement.
Connect the insert
Tie each cover ribbon to the matching loop or suitable attachment point on the duvet.
Can You Make Duvet Ties From Old Bed Sheets?
Yes. You can cut narrow strips from leftover sheet fabric and fold the long edges inward to hide the raw edges. Sew along the folded strip to create a simple fabric tie.
This is a useful way to reuse leftover material and keep the project consistent. Make sure the strips are not too thin or weak, especially if the duvet insert is heavy.
Do You Need More Than Four Ties?
Four corner ties are enough for many basic duvet covers. Larger or heavier inserts may benefit from extra attachment points along the sides, depending on the insert design.
If the insert has no matching loops, corner ties alone may not hold it as firmly. You can add suitable loops or use a cover design with additional secure attachment points.
Step 6: Finish The Open End Of Your Duvet Cover
The bottom opening needs a closure that keeps the duvet inside but still allows you to remove it for washing. You can use buttons, snaps, a zipper, hook-and-loop tape, or ribbon ties.
Before adding the closure, check the bottom edges. If the original sheet hems are already neat and strong, you may be able to reuse them. If you cut through the hems, fold the raw edges inward and press them flat before sewing.
Choose the closure based on your sewing skills and how often you expect to remove the cover. Buttons take more work because you need buttonholes, while snaps can be quicker to install. A zipper gives a neat finish but needs careful placement.
Source: i.pinimg.com
Buttons
A traditional option that can be durable when the buttons and buttonholes are sewn securely.
Sew-on snaps
A simple closure that lets you open and close the bottom without tying knots.
Zipper
A useful choice for a mostly closed opening, but it requires accurate sewing and a suitable zipper.
Hook-and-loop tape
An easy-to-use closure that can work well when both sides are firmly attached.
Ribbon ties
A simple handmade option that needs no buttonholes or zipper installation.
How To Add A Button Closure
Fold and press the bottom edges if they need a new hem. Decide how many buttons you want and mark their positions along one side of the opening. Space them evenly so the duvet stays inside.
Sew the buttons firmly to one edge. Then mark matching positions on the opposite edge and make buttonholes that fit the buttons. Test each button before inserting the duvet.
If your sheets have wide factory hems, you may be able to use those hems as the finished edges. Check that the fabric is strong enough to support the buttons.
Mark the button positions
Space the buttons evenly across the opening.
Sew the buttons
Attach each button with strong stitches.
Make matching buttonholes
Use the correct size for each button.
Test the closure
Open and close every button before using the cover.
How To Add Ribbon Ties
Ribbon ties are among the easiest closures for a beginner. Cut matching ribbon pieces and attach them at regular intervals along both sides of the opening.
Make sure each ribbon pair lines up. Tie the matching pieces together to close the cover. Leave enough space between the pairs for easy access when removing the duvet.
Use washable ribbon that suits the sheet fabric. Avoid thin decorative ribbon that may fray or break after repeated washing.
Is A Zipper A Good Choice?
A zipper can create a clean, nearly closed bottom edge. It is useful if you want to prevent the insert from slipping out through gaps between buttons or ties.
However, a zipper takes more care to install. Use a zipper foot if your sewing machine requires one, and check that the zipper length fits the opening. A zipper with damaged teeth or a weak slider can make the cover difficult to use.
Step 7: Turn The Cover Right Side Out And Insert The Duvet
Once the seams, corner ties, and closure are complete, turn the duvet cover right side out through the bottom opening. Push the corners out gently with your fingers so the cover has a clean shape.
Lay the duvet insert flat on a clean surface. Turn the cover inside out again if you prefer the roll method, or reach inside the cover to connect the corner ties. Both methods can work with a properly sized opening.
Match each corner of the insert with the corresponding corner of the cover. Secure the ties, then pull the cover over the insert. Smooth the fabric from the top toward the bottom to spread the filling evenly.
Close the bottom opening and lift the duvet gently. Give it a light shake to help the insert settle. The finished cover should look even, with the insert reaching all four corners without large empty areas.
Source: mygoldenthimble.com
Turn the cover
Bring the finished side outward and check all four corners.
Position the duvet
Lay the insert flat and match its corners with the cover.
Attach the ties
Connect the insert to the inside corner ties where possible.
Spread the filling
Smooth the cover and gently shake the duvet to remove bunching.
Close the opening
Fasten the buttons, snaps, zipper, or ribbon ties.
How To Use The Inside-Out Roll Method
The inside-out roll method can make a large duvet easier to insert. First, lay the duvet insert on the bed. Place the duvet cover on top of it with the opening at the foot of the bed.
Reach through the opening and grab the two far corners of the cover. Hold those corners together with the matching duvet corners. Roll the cover and insert toward the opening, then pull the cover over the rolled layers.
Unroll the bedding and adjust the corners. This method can save effort when working with a large King or California King duvet, although the exact steps may vary with the cover opening.
How To Make A Duvet Cover Without A Sewing Machine
You can make a simple duvet cover without a sewing machine by using suitable iron-on fabric bonding tape or washable fabric adhesive. This method is useful if you do not own a machine or only need a basic temporary project.
Start with two clean flat sheets and check that the bonding product is made for the fabric type. Some products need an iron, while others use a different application method. Follow the package instructions for heat, pressure, and washing limits.
Place the sheets together with the correct sides facing as required by the product instructions. Bond the top and side edges while leaving the bottom open. Work in small sections so the sheets remain aligned.
Finish the bottom opening with a compatible closure. You may use suitable snaps, ties, or another method supported by the materials. Let the adhesive cool or cure fully before inserting the duvet.
A no-sew cover may not be as strong as a well-made sewn cover, especially around the corners and closure. Check the bonded edges after washing and repair any loose sections before using it again.
Source: cdn.homedit.com
Choose washable bonding tape
Check that the product is suitable for your sheet fabric and intended laundry care.
Prepare the sheets
Wash, dry, and smooth both sheets before joining them.
Bond three sides
Follow the product directions and leave the bottom opening free.
Add a closure
Use a suitable closure that can handle normal use.
Check the bond
Inspect the edges and corners before placing the duvet inside.
Can You Use Regular Glue To Make A Duvet Cover?
Regular household glue is not a good choice for making a duvet cover. It may become stiff, crack, or fail when the fabric is folded and washed.
Use a fabric product that clearly states it is suitable for the material and the care routine you plan to follow. If the instructions do not confirm washability, do not assume the finished cover can go into a washing machine.
Is Iron-On Hem Tape Strong Enough?
Iron-on hem tape can work for some lightweight fabric projects, but its strength depends on the product, fabric, heat setting, and care instructions. A large duvet cover puts repeated stress on its long seams.
For a cover that will be used and washed often, machine-sewn seams are generally the more dependable construction method. If you use bonding tape, inspect it after each wash and stop using the cover if the seams begin to separate.
Common Mistakes To Avoid When Making A Duvet Cover
Most problems with homemade duvet covers come from poor measurements, weak seams, or an opening that is difficult to use. Checking these details before finishing the project can save time and fabric.
Do not rush through the measuring stage. A cover that looks fine when empty may become too tight when the duvet is inserted. Likewise, oversized sheets can create extra fabric that bunches around the filling.
Pay attention to the corners and bottom opening. These areas receive regular pulling and movement, so they need strong stitching and a secure finish.
Using the mattress size instead of the insert size
Measure the actual duvet insert. Mattress dimensions do not tell you the exact size of the bedding you need to cover.
Skipping the prewash
Unwashed sheets may shrink later, which can change the fit of the finished cover.
Choosing sheets that are too small
Check the usable dimensions before cutting or sewing.
Sewing the bottom closed
Keep the insertion end open until you have finished the closure design.
Forgetting corner ties
Without attachment points, the duvet may slide and bunch inside the cover.
Using weak thread or loose stitches
Test your stitching on a fabric scrap and reinforce areas that may receive extra stress.
Making the opening too small
Leave enough room to insert and remove the duvet without pulling hard on the seams.
Cutting before checking the pattern
Make sure stripes, flowers, or other designs face the direction you want.
What If The Finished Cover Is Too Big?
If the duvet cover is slightly too large, the insert may shift and leave loose fabric around the edges. Turn the cover inside out, place the insert inside, and identify how much extra room needs to be removed.
Mark the new seam lines while the insert is in place, but remove the duvet before sewing. Take in the side seams evenly rather than cutting one side without checking the overall shape.
If the extra space is small, corner ties and additional side attachment points may improve the fit without major alterations. Avoid making the cover so tight that it pulls against the duvet.
What If The Duvet Cover Is Too Small?
A cover that is too small may pull at the corners, flatten the duvet, or make the closure difficult to fasten. Do not force the insert inside because this can damage the seams or fabric.
Check whether you can release the side seams and sew them closer to the edges. If there is not enough fabric for the insert, you may need to add fabric panels or start again with larger sheets.
What If The Sheets Do Not Match In Size?
Lay the smaller sheet flat and use it as a guide. You can trim the larger sheet to match it if the smaller sheet is still wide and long enough for the duvet insert.
If the smaller sheet is too small, do not cut the larger one to match it. Consider adding fabric panels to both pieces or choosing another pair of sheets.
How To Care For Your Homemade Duvet Cover
A homemade duvet cover needs regular washing just like store-bought bedding. Follow the care labels on the original sheets and consider the closure materials when choosing a wash cycle.
Before washing, close the buttons, snaps, or zipper. This can reduce the chance of the closure catching on other laundry. If you used ribbon ties, check that they are secure and do not have loose ends that could become tangled.
Use a suitable detergent and avoid harsh cleaning methods that could weaken the fabric or stitching. Dry the cover according to the fabric care instructions and make sure it is fully dry before putting the duvet back inside.
Check the seams, corner ties, and closure from time to time. Repair loose stitches early instead of waiting for a small gap to become a large tear.
Follow fabric care labels
Use the washing and drying instructions for the original sheets.
Close the fasteners
Secure buttons, snaps, or zippers before putting the cover in the washer.
Inspect the seams
Look for loose stitches and weak corners after washing.
Dry fully
Make sure the cover is completely dry before inserting the duvet.
Repair damaged ties
Replace or resew loose ties so the insert stays in place.
How Often Should You Wash A Duvet Cover?
A duvet cover should be washed on a regular schedule based on how it is used. The right frequency can depend on pets, allergies, sweating, spills, and whether you sleep directly under the cover or use a top sheet.
Wash it sooner when it becomes visibly dirty or has an odor. Follow the care label and make sure the cover is dry before returning it to the bed.
How To Keep The Cover Looking Good
Avoid overloading the washing machine with bulky bedding. Large covers need room to move through the wash, and an overloaded machine may not clean or rinse them well.
Remove the cover carefully and check for loose threads. If the fabric has a decorative print, use the care method recommended for that material to help maintain its appearance.
Is Making A Duvet Cover From Bed Sheets Worth It?
Making a duvet cover from bed sheets can be worthwhile if you already own suitable sheets or find fabric at a reasonable price. You can choose your own colors, patterns, fabric feel, and closure style without being limited to ready-made designs.
It can also help you reuse bedding that is still in good condition. Instead of throwing away a flat sheet from an old set, you may be able to give it a new purpose as part of a duvet cover.
However, the project is not always cheaper than buying a finished cover. You may need to purchase two sheets, thread, closure materials, and other sewing supplies. If you do not own a sewing machine, the cost of supplies or paid sewing help may change the total.
The best choice depends on what you already have and how much time you want to spend. If your sheets fit the insert and you enjoy simple sewing projects, making your own cover can be a practical bedroom update.
Good for customization
You can combine two colors, reuse old patterns, or make a reversible cover.
Useful for fabric reuse
Good-quality flat sheets can become useful bedding instead of going to waste.
Flexible sizing
You can measure your own insert and adjust the cover to fit it.
Requires some sewing time
Handling large fabric pieces and finishing the opening takes patience.
Not always the cheapest option
New sheets and sewing supplies may cost more than expected, so compare your materials before starting.
Homemade Duvet Cover Vs. Store-Bought Duvet Cover
A homemade duvet cover gives you more control over its dimensions and design. A store-bought cover may save time because it already has finished seams, closures, and attachment points.
Neither option is automatically better. The homemade version makes sense when you have suitable sheets and want a custom design. A ready-made cover may be more practical when you need a specific size quickly or do not want to sew.
Homemade cover
Offers control over fabric, size, color, and closure, but requires materials and sewing work.
Store-bought cover
Saves construction time and may include finished details, but offers less control over the design and exact fit.
Frequently Asked Questions
Q
Can I make a duvet cover from two regular bed sheets?
Yes. Two flat bed sheets are a common starting point for a homemade duvet cover. Measure your duvet insert first and check that both sheets have enough usable fabric to cover it.
Place the sheets with their right sides facing each other, sew the top and two side edges, and leave the bottom open. Add corner ties and a closure before inserting the duvet.
Q
What size sheets do I need for a duvet cover?
The sheet size depends on the actual dimensions of your duvet insert. Twin, Full, Queen, and King labels are useful starting points, but sizes can vary between brands.
Measure the insert and compare its width and length with the usable fabric on both sheets. Include enough extra material for seam allowances and the bottom opening.
Q
Can I make a duvet cover without sewing?
Yes. You can join two flat sheets with suitable washable fabric bonding tape or fabric adhesive. Follow the product instructions and leave one end open for the duvet.
A no-sew cover may not be as durable as one with machine-sewn seams. Check the bonded edges after washing and repair any areas that begin to separate.
Q
How do I stop my duvet from moving inside the cover?
Add ties to the inside corners of the duvet cover and connect them to matching loops on the duvet insert. Four corner attachments are a useful starting point for many designs.
For a larger or heavier insert, additional attachment points may help. Make sure the ties are securely sewn and do not damage the insert.
Q
Should a duvet cover be bigger than the duvet insert?
The finished duvet cover should generally be close to the size of the insert. A cover that is much larger can allow the filling to shift, while a cover that is too small may pull against the seams.
Add seam and hem allowances when cutting the sheets, but do not confuse those extra measurements with the finished cover size.
Q
Can I use two different sheets to make a reversible duvet cover?
Yes. You can use two different colors or patterns to create a reversible cover. Choose sheets with similar fabric weights and compatible washing instructions.
Make sure both patterns face the correct direction before sewing. After turning the finished cover right side out, either side can become the visible top.
Q
Do I need to hem the bottom of a homemade duvet cover?
You need a neat, strong finish around the bottom opening, but you may not need to create a new hem if the original sheet hems are already finished and suitable for reuse.
If you cut through the original hems, fold the raw edges inward, press them, and sew them before attaching your chosen closure.
Q
How long does it take to make a duvet cover from bed sheets?
The time depends on your sewing experience, the size of the sheets, and the closure you choose. A basic design with three sewn edges and ribbon ties is simpler than one with a zipper or multiple decorative details.
Allow extra time for washing, drying, measuring, pressing, and checking the finished fit. Rushing the measuring and cutting stages can lead to mistakes that take longer to fix.
✦ Wrapping Up
Conclusion
Making a duvet cover from bed sheets is a practical DIY project that can give old or unused bedding a new purpose. With two flat sheets, basic sewing supplies, and a few simple steps, you can create a washable cover that fits your duvet insert.
Start by measuring the insert and checking that your sheets are large enough. Wash and prepare the fabric, pin the layers together, and sew the top and side edges. Then add corner ties and finish the bottom opening with buttons, snaps, a zipper, or ribbon ties.
Take your time with the measurements and seams. A well-fitted cover should allow the duvet to spread evenly while making it easy to remove for washing. If you do not have a sewing machine, suitable fabric bonding products offer another option, although the finished seams need regular checks.
💡 Key Takeaway
Gather two flat sheets, measure your duvet insert, and choose your bottom closure before cutting anything. A little planning will help you make a neat, comfortable, and reusable duvet cover that suits your bedroom.