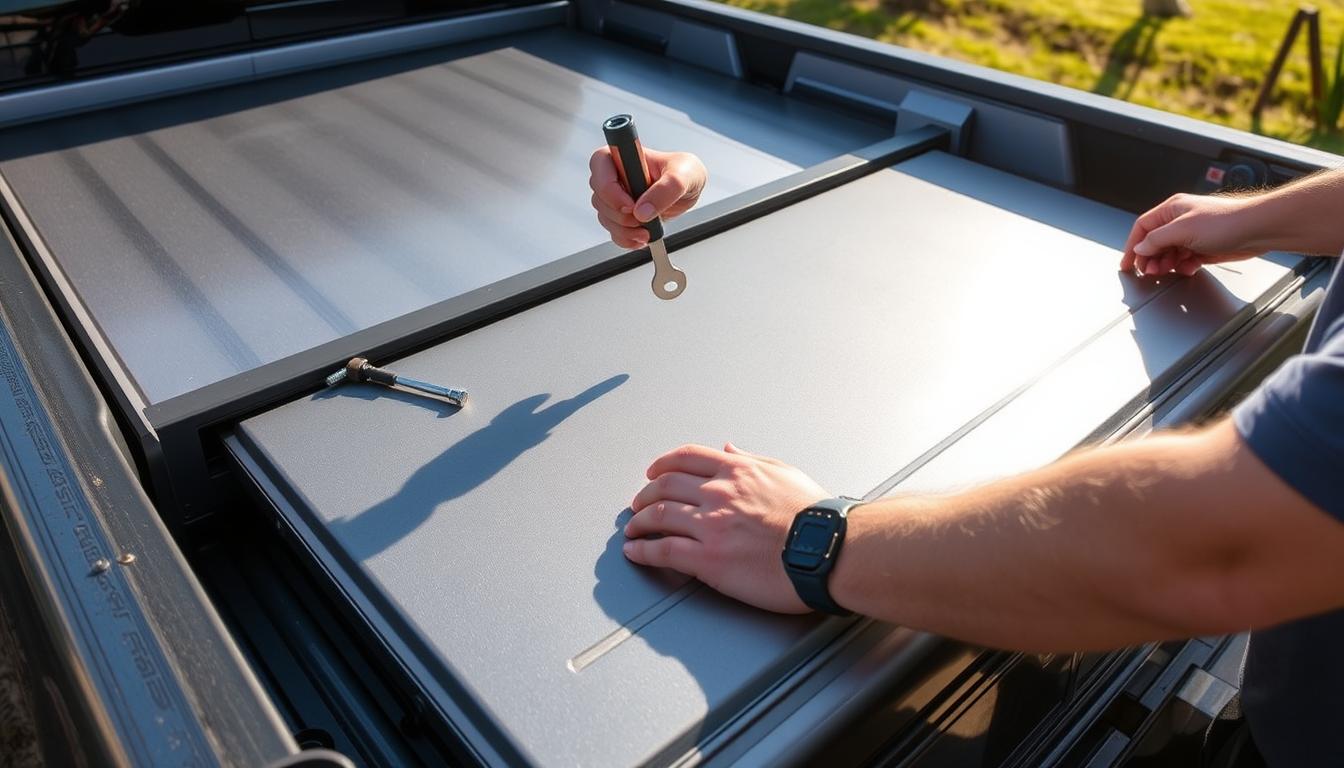
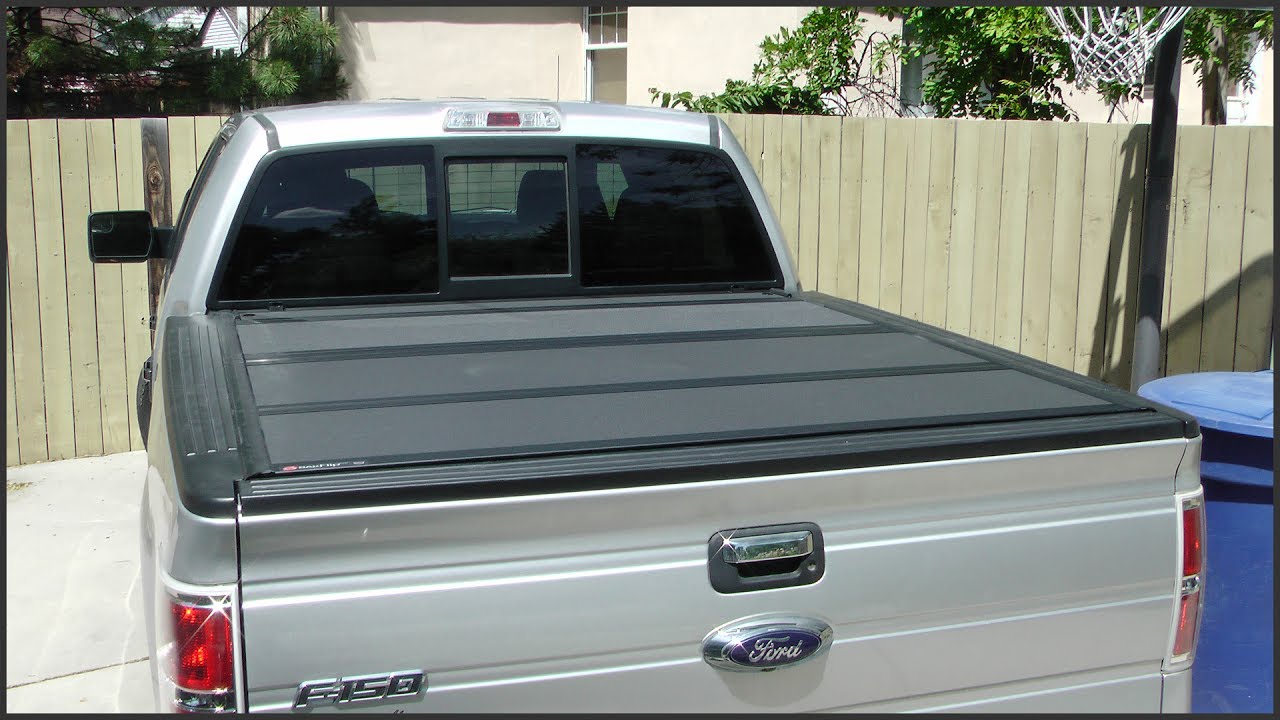
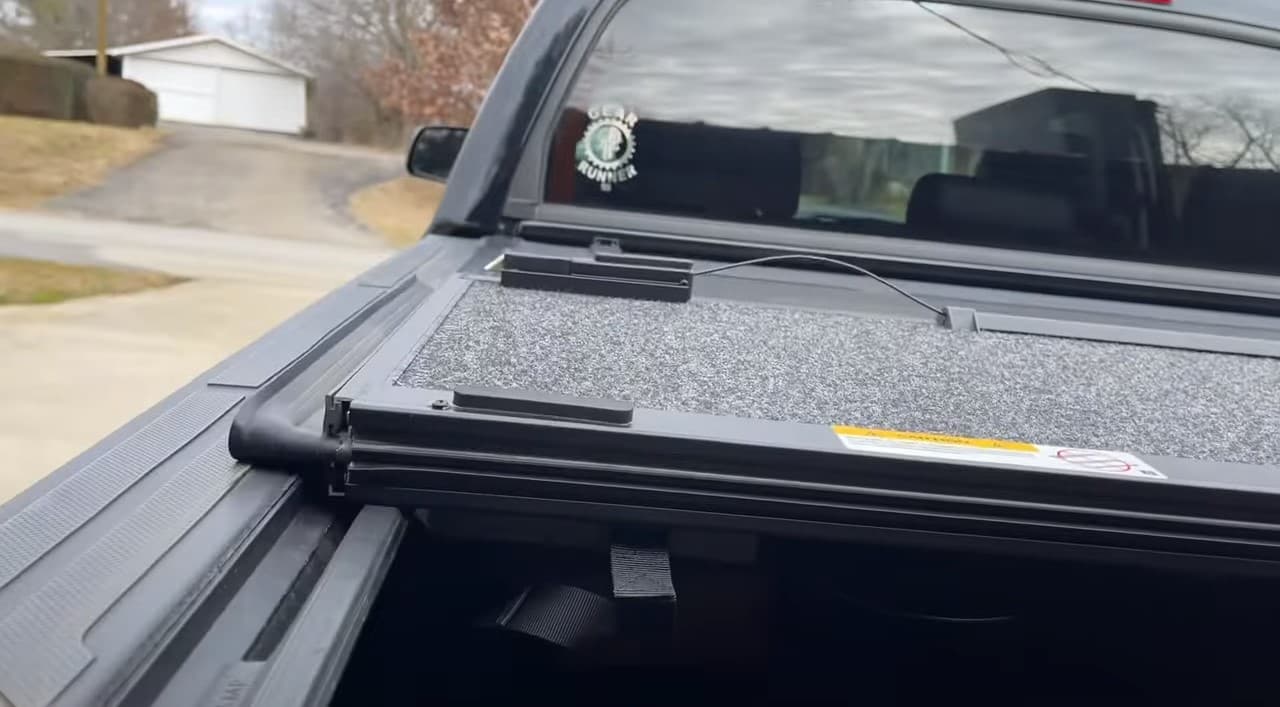
To install a truck bed cover, clean the truck bed, check that the cover fits your truck, attach the mounting rails or brackets, position the cover, tighten the supplied clamps, and test every latch and seal before driving.
Pickup truck owners across the United States use bed covers to protect cargo from rain, road dirt, and unwanted attention. A tonneau cover can also help keep loose items in place when you travel. Whether you drive a Ford F-150, Chevrolet Silverado, Ram 1500, Toyota Tacoma, or another pickup, the right installation starts with matching the cover to your truck’s exact bed size and model year.
Most clamp-on truck bed covers can be installed at home with basic hand tools. The exact process depends on the cover style, truck bed, and mounting system. Soft roll-up covers, hard folding covers, and retractable covers do not all use the same hardware, so the manufacturer’s instructions should always guide the final steps.
A good installation is about more than making the cover sit flat. The side rails must be aligned, the clamps must grip the correct parts of the bed, and the seals must meet the truck bed without being crushed. Take your time during alignment because a small mistake at the front can cause poor latch contact, water leaks, or trouble opening the cover later.
Before learning how to install a truck bed cover, identify its design. Different covers use different mounting parts, and the wrong installation method can damage the product or truck. Most pickup bed covers fall into four common groups.
A soft roll-up cover uses flexible fabric stretched across a frame or side rails. It rolls toward the cab when you need access to the bed. A hard folding cover uses rigid panels that fold into sections, while a retractable cover slides into a canister near the cab. A one-piece hard cover usually lifts on hinges and may use gas struts.
The basic preparation is similar for many designs, but the mounting steps can vary. For example, a roll-up cover may need tension adjusters and rear latches. A folding cover may use retainer brackets, front clamps, and support straps. A retractable cover may require more careful track alignment and drainage work.
Source: coveradvice.com
Soft roll-up cover
Uses fabric, side rails, crossbars, and a rolling assembly. Installation often includes tension adjustment and front and rear seals.
Hard folding cover
Uses two or more rigid panels with hinges and locking points. The panels must sit evenly and allow every latch to engage.
Retractable cover
Slides along tracks into a storage canister. Both tracks must remain aligned so the cover moves without binding.
One-piece hinged cover
Uses hinges and support hardware. It may need model-specific brackets and a helper to lift and position it.
Why the Cover Style Matters
A clamp-on cover is often a manageable home project, but not every cover is a universal fit. Some models attach to the inside bed flange, while others use factory cargo tracks or vehicle-specific mounting brackets. Covers that require drilling, cutting, or special electrical connections need additional care.
Read the installation sheet before choosing your tools or removing any truck components. Do not assume that instructions for one brand or cover style will work for another.
Check the mounting method
Look for clamp-on, track-mounted, bolt-on, or drill-required instructions.
Check the included hardware
Confirm that the brackets, clamps, bolts, washers, seals, and other listed parts are included.
2. Check Truck Bed Compatibility Before Installation
The first practical step is confirming that the tonneau cover matches your pickup. A cover can look close to the right size and still fail to fit because of a different bed length, rail design, or tailgate setup. Always check the manufacturer’s fitment information before installing anything.
Measure the bed using the method specified by the cover manufacturer. Pickup bed lengths are commonly described by nominal measurements, but the actual usable dimensions can differ between truck models. Do not rely only on a trim name or a measurement taken from an online advertisement.
Also inspect the truck’s factory equipment. Bed liners, rail caps, cargo management systems, tie-down cleats, and utility tracks can affect how the mounting brackets attach. Some covers are designed to work with spray-in liners, while others may need adjustments for plastic liners that extend over the bed rails.
Source: i.ytimg.com
Truck make and model
Confirm the exact vehicle manufacturer, model, and model year listed in the cover’s fitment guide.
Bed length
Match the cover to the correct short, standard, or long bed configuration.
Bed rail design
Check whether your truck has factory rail caps, cargo tracks, or other mounting features.
Tailgate design
Check for special tailgate caps, built-in steps, or other features that may affect rear seal contact.
Bed liner
Find out whether the cover supports your spray-in, drop-in, or over-the-rail liner.
How to Measure a Truck Bed
Use a tape measure to check the distance from the inside front wall of the bed, also called the bulkhead, to the inside edge of the tailgate area. Measure along the bed floor and keep the tape straight. Check the width at the points required by the cover manufacturer.
Compare your measurements with the manufacturer’s fitment chart. A nominal 5.5-foot bed, for example, should not be treated as an exact measurement of 5 feet 6 inches for every truck. The manufacturer uses specific vehicle dimensions to determine compatibility.
Do not measure only the outside
The outside body length does not tell you the usable mounting dimensions inside the bed.
Check both sides
Compare the bed rail positions to identify damage or unusual differences before installation.
What If Your Truck Has a Bed Liner?
A spray-in bed liner usually does not interfere with clamp-on mounting, provided the cover is designed for that setup. An under-the-rail drop-in liner may also work with many covers. However, an over-the-rail plastic liner can block the clamp contact points or prevent the side rails from sitting flat.
Some manufacturers provide specific instructions for trimming a liner or using different seals. Never cut a bed liner simply because a clamp does not fit. Confirm that the manufacturer permits the change and identify the exact areas that may be modified.
Spray-in liner
Check that the rail surface is clean and that the clamps can grip the intended mounting area.
Drop-in liner
Check whether the liner changes the required bulkhead seal thickness or clamp position.
Over-the-rail liner
Check the installation guide for approved clearance or trimming instructions.
3. Gather the Tools and Installation Supplies
Gathering the right tools before starting makes installation easier. Many clamp-on tonneau covers need only a few common hand tools. Other models include special fasteners or brackets that require a particular wrench or screwdriver.
Place the cover components on a clean surface near the truck. Keep small bolts, washers, nuts, and clamps together so nothing gets lost. If the cover is large or heavy, ask another person to help lift and position it.
The following list covers common supplies. Your exact kit may require fewer or additional items, so use the manufacturer’s parts list as the final guide.
Source: i.ytimg.com
Socket wrench or combination wrench
Used to tighten the mounting hardware when the instructions specify a wrench.
Screwdriver or Torx driver
Needed for certain brackets, buckles, and model-specific fasteners.
Tape measure
Helps check alignment, bed dimensions, and spacing.
Clean cloth and mild cleaner
Removes dust, dirt, and residue from the bed rails and bulkhead.
Protect your eyes during installation and any manufacturer-approved drilling.
Helper
Useful for positioning a large folding, retractable, or one-piece hard cover.
Inspect the Package Before You Begin
Open the package carefully and compare the contents with the parts diagram. Look for bent rails, damaged fabric, cracked panels, missing clamps, and loose hardware. Check that the driver-side and passenger-side components are identified correctly.
If a required part is missing or damaged, contact the seller or manufacturer before continuing. Improvised bolts or clamps may not provide the correct fit or holding force.
Read the full manual
Review the installation sequence, warnings, hardware list, and model-specific notes.
Keep the hardware organized
Separate the clamps, brackets, washers, and fasteners so each part is easy to find.
4. Prepare and Clean the Truck Bed
A clean mounting surface helps the rails and weather seals sit properly. Dirt, gravel, old adhesive, and loose debris can create gaps or prevent clamps from making proper contact. Remove anything stored in the bed before beginning.
Wash the bed rails and front bulkhead with a suitable mild cleaner. Wipe away dust and let the surfaces dry. If the cover uses adhesive weather stripping, follow the instructions for cleaning and preparing the surface before removing the adhesive backing.
Inspect the bed for dents, rust, damaged rail caps, and loose accessories. A bent mounting surface can make it difficult to align the cover. Resolve any major damage before installing the hardware.
Source: i.ytimg.com
Remove loose cargo
Clear the entire bed so you have enough room to position the rails and cover.
Clean the mounting areas
Remove mud, dust, grease, and other material from the bed rails and bulkhead.
Inspect the rail surfaces
Look for dents, corrosion, damaged plastic caps, and loose factory accessories.
Check drainage areas
Locate the factory drain openings and check whether the cover kit includes drain tubes.
Install the Front Bulkhead Seal
Many tonneau covers use a foam or rubber seal along the front wall of the truck bed. This seal helps close the gap between the cover and the bulkhead. Some kits include more than one seal thickness to account for different truck or bed liner configurations.
Clean and dry the bulkhead before applying the seal. Place it where the instructions show, usually along the top edge of the front bed wall. Press it down evenly without stretching the material.
Do not add extra foam or stack seals unless the manufacturer specifically allows it. Too much material can lift the front of the cover and affect alignment.
Use the correct seal
Choose the supplied thickness specified for your truck and bed liner.
Avoid stretching the seal
Stretching can cause the material to shrink back and leave gaps later.
5. Install the Side Mounting Rails
For many roll-up and hard folding covers, the side rails are the main support for the cover. They run along the left and right sides of the truck bed. Their position affects how the cover sits, how the latches engage, and how the seals meet the bed.
Identify the driver-side and passenger-side rails before placing them on the truck. Follow the arrows or labels in the installation guide. Some rail systems have a front end, a rear strike, or a specific orientation for drain fittings.
Set the first rail on the correct bed edge. Position it according to the manufacturer’s instructions, keeping it level and aligned with the bed. Install the supplied clamps loosely enough to allow small adjustments. Repeat the process on the other side.
Source: i.ytimg.com
Position the first rail
Place the correct rail on its matching bed side and align it with the specified front and rear reference points.
Install the clamps
Fit the supplied clamps in the positions shown in the manual, ensuring their jaws grip the correct bed structure.
Keep the rail level
Check that the rail sits evenly and does not tilt or shift while you work.
Repeat on the opposite side
Install the second rail using the same alignment method.
How Tight Should the Mounting Clamps Be?
Tighten the clamps only to the level specified by the manufacturer. Some systems use a stated torque value, while others specify hand tightening or a particular number of turns. There is no single torque value that applies to every tonneau cover.
A clamp that is too loose may allow the rail to move during use. A clamp that is too tight may damage the rail, fastener, bed flange, or plastic bed cap. Use a torque wrench when the manual provides a torque specification.
After tightening each clamp, check that the clamp teeth or pads remain in the intended position. A fastener can feel tight even when the clamp is not gripping the correct surface.
Check clamp contact
Make sure the clamp grips the intended metal flange or approved mounting point.
Avoid excessive force
Do not use an impact driver or extra leverage unless the manufacturer specifically permits it.
Recheck rail alignment
Confirm that tightening the clamps did not pull the rails out of position.
What If the Rails Do Not Sit Flat?
Stop and check the installation instead of forcing the rails into place. A bed liner, rail cap, cargo track, or incorrect bracket may be blocking the mounting area. Check whether the left and right rails have been reversed or whether a spacer is missing.
If the manual does not show a safe way to correct the problem, contact the cover manufacturer or a qualified installer. Do not drill new holes or modify the truck bed without approved instructions.
Check for obstructions
Look for liner edges, tie-downs, dirt, and accessories under the mounting points.
Verify the hardware
Confirm that each bracket and spacer matches the supplied parts diagram.
6. Position and Attach the Truck Bed Cover
Once the rails are aligned, place the cover on the mounting system. The exact method depends on the cover design. A helper is useful because a large cover can be awkward to lift, and one uneven placement can shift the rails.
For many folding covers, place the folded assembly near the cab with the front panel facing the correct direction. For a roll-up cover, position the rolled assembly at the front of the bed and align its mounting points with the side rails. A retractable cover may require the canister and tracks to be assembled according to a separate sequence.
Do not fully tighten every mounting fastener before checking the cover’s position. Keep adjustment points accessible until the cover is centered and the front and rear seals meet the correct surfaces.
Source: truckcoverexpert.com
Installing a Soft Roll-Up Cover
Place the rolled cover assembly at the front of the truck bed. Align the front bar with the mounting rails and attach the supplied hardware. Some designs use tension adjusters that connect the front bar to the rails.
Install the crossbars or support bows in the positions shown in the manual. These parts help support the fabric and maintain the cover’s shape. Make sure each bar is fully seated before unrolling the cover.
Unroll the fabric toward the tailgate and check its alignment. The material should cover the bed without pulling heavily to one side. Secure the rear bar into its latches and adjust the tension using the supplied mechanism.
Center the front bar
Make sure it sits evenly between the left and right rails.
Fit the support bows
Install each crossbar in its correct position and orientation.
Adjust fabric tension
Follow the manufacturer’s method to remove excessive slack without overstretching the material.
Installing a Hard Folding Cover
Place the folded cover near the cab and align its front mounting points with the rails. Attach the supplied retainer clamps, brackets, or mounting bolts. Keep the adjustment hardware loose enough to move the cover into its final position.
Unfold the panels carefully toward the tailgate. Check that the cover is centered from side to side and that the rear seal meets the tailgate as the manual specifies. If the cover sits too far forward or backward, adjust its position before fully tightening the mounting hardware.
Fold the cover again to reach any hidden clamps or brackets. Tighten the remaining hardware according to the supplied instructions. Install safety straps, buckles, cab bumpers, and other included accessories in their specified positions.
Check panel alignment
Make sure the folding sections line up and sit evenly across the truck bed.
Check the rear seal
Confirm that the tailgate seal makes the intended contact without being crushed.
Install safety hardware
Fit all supplied straps, buckles, and support components before use.
Installing a Retractable Cover
Retractable covers often require more assembly than simple roll-up or folding designs. The canister, side tracks, brackets, and drainage tubes must be installed in the correct order. Read the model-specific guide before lifting the canister into place.
Position the canister near the front of the bed and attach the side tracks. Check that both tracks are level and parallel. A small difference in track alignment can make the cover bind or fail to close properly.
Move the cover through its full travel path by hand if the manufacturer permits it. It should move without catching or scraping. Complete the specified locking and drainage connections before using the cover.
Align both tracks
Use the specified measurements and mounting references to keep the tracks parallel.
Check cover movement
Look for binding, uneven gaps, or resistance along the track.
Secure the canister
Install all required brackets and fasteners before operating the cover.
7. Align the Cover and Tighten All Hardware
Correct alignment is one of the most important parts of truck bed cover installation. The cover should sit squarely on the bed, with the front and rear seals positioned as intended. A cover that is shifted too far to one side may have uneven gaps or latches that fail to engage.
Check the cover from the rear and both sides. Compare the panel edges with the bed rails. Look at the front bulkhead seal and tailgate area to make sure the cover does not leave an unintended opening.
If the cover needs adjustment, loosen only the hardware needed to move it. Shift the cover gently, check the fit again, and then tighten the mounting points in the sequence provided by the manufacturer. Avoid forcing the panels or pulling on the fabric to make an incorrect fit appear acceptable.
Source: i.ytimg.com
Check side-to-side alignment
The cover should be centered over the bed and sit evenly on both mounting rails.
Check front alignment
The front seal should meet the bulkhead as described in the installation guide.
Check rear alignment
The rear edge and seal should meet the tailgate in the intended position.
Tighten in the correct order
Use the manufacturer’s tightening sequence and torque values where supplied.
Make Sure the Tailgate Opens and Closes
Open and close the tailgate slowly while watching the rear edge of the cover. It should move freely without striking a panel, latch, or mounting bracket. Some covers are designed to overlap the tailgate, while others use a specific gap or seal arrangement.
Do not use a universal clearance measurement. Follow the instructions for your exact cover and truck combination. If the tailgate rubs against the cover, adjust the approved mounting points before using the truck.
Open the tailgate
Check that it clears the rear panel and mounting hardware.
Close the tailgate
Confirm that it does not push the cover upward or prevent the latch from engaging.
8. Install Weather Seals and Drain Tubes
Weather seals help limit the amount of water, dust, and road debris that enters the truck bed. However, a tonneau cover should not automatically be treated as fully waterproof. The level of weather protection depends on the cover design, truck bed condition, seal placement, and tailgate configuration.
Check the front, side, and rear sealing surfaces. Some kits use adhesive foam strips, while others use built-in rubber seals or flexible flaps. Make sure the material is positioned correctly and does not fold under the cover.
If your kit includes drain tubes, connect them to the specified rail or canister outlets. Route them through approved factory openings when possible. Make sure the tubes are not pinched, sharply bent, or blocked by other equipment.
Source: i.ytimg.com
How to Install Drain Tubes
Find the drain outlets on the cover rails or storage canister. Attach each tube using the supplied fitting and check that the connection is secure. Route the other end toward an approved drainage opening in the truck bed.
Some trucks have factory openings behind the cab or near the bed corners. The correct location depends on the vehicle. If the manual calls for drilling a new opening, follow its exact location, size, and protective finishing instructions. Do not drill into the truck based on guesswork.
Pouring a small amount of water through the drainage channel may help confirm that the tube is connected and not blocked, provided the manufacturer permits this check. Watch the outlet to confirm that water can leave the system.
Secure each connection
Make sure the drain tube is fully seated on its fitting.
Avoid pinching
Keep the tube clear of clamps, cargo, and sharp bends.
Keep the outlet clear
Check that dirt and debris cannot block the drainage path.
How to Check for Water Leaks
After installation, inspect the seals and drainage system. If the manufacturer permits a water test, apply a gentle flow of water around the closed cover. Avoid directing a high-pressure washer at the seals because strong pressure can force water past areas that would not leak during normal rain.
Check the bed floor, front corners, side rails, and tailgate area. A small amount of water near a tailgate gap does not always mean the cover itself is defective. Identify the entry point before changing the seal arrangement.
Water near the front
Check the bulkhead seal and front mounting alignment.
Water along the sides
Inspect the side seals and rail position.
Water near the tailgate
Check the rear seal, tailgate clearance, and approved drainage design.
9. Test the Cover Before Driving
Do not consider the installation complete until every latch, clamp, strap, and locking part has been checked. A cover may look secure while one mounting point remains loose. A short inspection now can prevent damage or a road hazard later.
Open and close the cover several times. Watch the panels or fabric as they move. Check that the latches engage fully and that the cover does not rub against the truck cab, tailgate, or bed rails.
If the cover can be driven in an open position, use only the travel configuration approved by the manufacturer. Some folding covers require all panels to be folded and secured at the cab. Others have specific straps or support hardware. Never drive with the cover partly open or unsecured unless the manual expressly permits that exact position.
Source: truckcoverexpert.com
Check every mounting clamp
Confirm that each clamp is correctly positioned and tightened to the specified level.
Test the locking system
Make sure the cover locks and releases without unusual force.
Inspect the seals
Look for rolled, twisted, missing, or uneven weather stripping.
Check the tailgate
Make sure the tailgate opens and closes without interference.
Secure open-position hardware
Attach all required straps, buckles, or support components before driving with the cover open.
Signs of a Successful Installation
A properly installed cover should sit evenly on its mounting system and operate according to its design. The panels should fold smoothly, the fabric should have the specified tension, or the retractable section should travel along its tracks without binding.
The mounting rails should not move when you gently check them by hand. Every required clamp should remain in position, and the seals should make the intended contact with the truck bed. There should be no loose hardware or exposed parts that can interfere with the tailgate.
Even fit
The cover sits squarely without obvious twisting or uneven gaps.
Smooth operation
The cover opens, closes, folds, or retracts as designed.
Secure attachment
All mounting clamps and brackets remain firmly attached.
Proper closure
All required latches and locking points engage correctly.
10. Common Truck Bed Cover Installation Problems
Most installation problems come from incorrect fitment, poor rail alignment, misplaced clamps, or seals that do not sit correctly. Fix the cause rather than forcing the cover into position. Start with the simplest checks and refer to the exact installation manual before changing hardware.
Source: i.ytimg.com
Cover does not sit flat
Possible causes include uneven rails, an incorrect seal, a missing spacer, or a bed liner that blocks the mounting surface. Check the rail position and supplied hardware.
Tailgate will not close
The cover may be too far back, the rear seal may be incorrectly positioned, or the tailgate cap may interfere. Check the model-specific clearance instructions.
One latch will not engage
The cover may be shifted, the rail may be out of alignment, or the latch bracket may need an approved adjustment.
Roll-up fabric is too loose
Check the tension adjusters and front bar position. Use only the adjustment method supplied with the cover.
Retractable cover gets stuck
Inspect track alignment, debris, and mounting pressure. Do not force the cover through a jam.
Water enters the bed
Inspect the bulkhead, side seals, tailgate area, and drain tubes. Identify the entry point before replacing seals.
Rail moves after installation
Check clamp placement and the specified tightening procedure. Stop driving until the rail is secure.
Can You Install a Truck Bed Cover Without Drilling?
Yes, many modern clamp-on truck bed covers can be installed without drilling. These models use supplied clamps or brackets to attach to the existing bed structure. They are often suitable for a home installation when the truck has the correct fitment and mounting points.
However, not every tonneau cover uses a no-drill system. Certain retractable covers, vehicle-specific mounting systems, or special installations may require drilling or other modifications. Check the product instructions before starting.
If drilling is required, confirm the exact location and method. Avoid drilling near wiring, fuel system parts, or other vehicle components. If you cannot identify a safe mounting location, ask a qualified installer for help.
Choose a compatible clamp-on model
Confirm that the cover is designed for your exact truck and bed configuration.
Do not modify the bed without guidance
Use only the drilling or trimming instructions approved for your cover.
What Are the Most Common Installation Mistakes?
One common mistake is tightening the clamps before the cover is aligned. This can make later adjustments difficult and may leave the rear panel out of position. Another mistake is assuming that every truck bed has the same mounting surface.
Skipping the final operation test is also risky. A cover can appear secure while a latch or safety strap is still loose. Take time to check the complete system before placing cargo in the bed or driving.
Ignoring fitment information
A cover for a different bed length or model year may not align correctly.
Overtightening hardware
Too much force can damage clamps, rails, and bed surfaces.
Skipping seal installation
Missing or poorly placed seals can allow water and dirt to enter.
Driving with loose hardware
An unsecured cover can shift or detach during travel.
11. Maintain Your Truck Bed Cover After Installation
Regular maintenance helps keep the cover working as intended. Check the mounting hardware after the initial settling period specified by the manufacturer. Some installation guides recommend an early check because foam seals or isolators can compress after use.
Inspect the clamps, bolts, straps, latches, and seals from time to time. The inspection schedule depends on the cover and how often you use the truck. Follow the manual if it gives a specific mileage or time interval.
Clean the cover with products approved for its material. Soft vinyl, painted aluminum, and other cover surfaces may need different care. Avoid harsh chemicals or abrasive brushes that can damage the finish or weather seals.
Source: i.ytimg.com
Check mounting hardware
Look for loose clamps, shifted brackets, damaged bolts, and other signs of movement.
Clean the cover
Use a suitable cleaner and a soft cloth or sponge according to the care instructions.
Inspect weather seals
Look for cracks, tears, dirt buildup, and sections that have come loose.
Keep drainage paths clear
Remove leaves, dirt, and other debris that may block drain tubes or channels.
Lubricate only approved parts
Use the lubricant and maintenance method specified for the hinges, tracks, or moving parts.
When Should You Recheck the Clamps?
Follow the manufacturer’s recommended inspection schedule. Some covers call for a check after the first week, while others provide a different interval. Temperature changes, rough roads, frequent opening, and bed liner compression can affect mounting hardware over time.
If you hear rattling, notice a moving rail, or see a change in the cover’s position, inspect the mounting system before driving again. Do not simply tighten every fastener as much as possible. Use the correct procedure and torque specification.
After initial installation
Complete any early clamp check required by the product instructions.
During routine maintenance
Inspect the mounting points and moving parts at the recommended intervals.
After unusual movement
Check the cover after a hard impact, visible shifting, or unexpected rattling.
Frequently Asked Questions
Q
How long does it take to install a truck bed cover?
Installation time depends on the cover design, truck bed, and mounting system. A simple clamp-on roll-up or folding cover may take a home installer a few hours or less. A retractable system or a cover that requires additional brackets and drainage work may take longer.
Allow extra time for reading the manual, checking the parts, and adjusting the cover. Rushing the alignment process can lead to loose clamps or poor sealing.
Q
Can one person install a truck bed cover?
One person may be able to install some lightweight soft roll-up covers. However, a helper is recommended for large hard folding covers, retractable canisters, and one-piece hard covers.
A second person can hold the assembly level while you align the mounting points. This reduces the chance of dropping the cover or shifting the rails during installation.
Q
Do I need special tools to install a tonneau cover?
Most basic clamp-on covers need common tools such as a socket wrench, screwdriver, tape measure, and cleaning cloth. Some models require Torx drivers, a torque wrench, or special hardware.
Check the manufacturer’s tool list before starting. Do not substitute different fasteners or use power tools when the installation guide requires hand tightening.
Q
Can I install a truck bed cover with a bed liner?
Yes, many truck bed covers work with spray-in and certain drop-in bed liners. However, an over-the-rail liner may block the mounting points or prevent the side rails from sitting correctly.
Check the cover’s compatibility guide for your liner type. If trimming is required, follow the manufacturer’s exact instructions rather than cutting the liner by guesswork.
Q
Will a truck bed cover keep all water out?
No truck bed cover should be assumed to make the bed completely waterproof. Most designs use weather seals and drainage channels to reduce water entry, but small amounts of moisture may still enter around the tailgate or other openings.
Correct installation improves weather protection. Check the seals, bulkhead contact, and drain tubes if you notice water inside the bed.
Q
Can I drive with my tonneau cover open?
That depends on the cover design and its approved travel positions. Some folding covers can be secured fully open with supplied straps or buckles. Some roll-up covers can be rolled and fastened near the cab.
Never drive with a cover in a partially open or unsecured position unless the manufacturer specifically approves that configuration. Check that all required straps, clamps, and locks are attached before moving the truck.
Q
Why does my new truck bed cover not close properly?
Common causes include incorrect rail alignment, a cover positioned too far forward or backward, misplaced seals, or a latch bracket that needs adjustment. A bed liner or tailgate cap can also interfere with the fit.
Check the fitment information and installation sequence. Make small adjustments using the approved mounting points, then test the cover again. Do not force the latch or bend the panel to make it close.
Q
Should I hire a professional to install a truck bed cover?
A professional installer can help if the cover is heavy, requires drilling, uses a complex retractable system, or does not fit correctly during a home installation. Professional help is also useful when the truck has unusual bed accessories or damaged mounting surfaces.
A basic clamp-on cover may be suitable for a careful DIY installation when the instructions are clear and the correct parts are available.
✦ Wrapping Up
Conclusion
Learning how to install a truck bed cover is easier when you follow the correct sequence. Start by confirming vehicle compatibility, gathering the required tools, and cleaning the truck bed. Then install the mounting rails, position the cover, adjust its alignment, and tighten the hardware according to the manufacturer’s instructions.
Pay close attention to the clamps, seals, latches, and drainage system. These parts help keep the cover in position and allow it to work as intended. A rushed installation can lead to poor fit, water entry, loose hardware, or damage to the truck.
Before driving, test the complete cover and make sure every required latch and safety strap is secured. Keep the installation manual so you can check the maintenance schedule and make future adjustments correctly.
💡 Key Takeaway
Before starting your installation, confirm your truck’s exact bed size and cover compatibility. Keep the manufacturer’s instructions nearby, use the supplied mounting hardware, and complete a full alignment, latch, seal, and clamp inspection before driving.